Set clear expectations: This short guide helps you build a practical pantry-friendly Coffee and tea station that speeds up your mornings while keeping the kitchen calm. You’ll learn to group pods, beans, syrups, mugs, and tools so everything has a home.
Who this is for: you with a small counter, a cabinet, a butler’s pantry, or a movable bar cart for guests. The plan is simple: choose a spot, map zones, pick essentials, then organize pods, jars, grounds, and sticky syrups for easy reach and cleanup.
What to expect: clear layout tips, smart storage ideas, and easy upgrades like shelves, rails, and mats. The best coffee bar ideas balance reach, height, and tidy cleanup with simple decor so the setup looks intentional in your home.
Choose the best spot for your coffee bar at home
Pick a spot that matches your morning flow and the layout of your house. Consider traffic, water access, and how much counter and cabinet space you can spare. The right place makes setup, cleanup, and serving easier for you and guests.

Under the stairs
Under-stairs spaces can be surprisingly useful. Use open wood shelves for daily items and closed cabinet storage for backups. Add a small refrigerator if you often entertain; designer Marnie Oursler recommends this for a compact, efficient bar.
Butler’s pantry
A butler’s pantry gives you storage, prep, and cleanup in one place. Keep mugs and bulk supplies nearby and consider a prep sink to fill your brewer easily, as Kasey Fitzgerald suggests.
Hallway niche or alcove
Turn a shallow niche into a polished place with a waterfall counter or a wall treatment for depth. Vertical shelves and a narrow counter let you create a built-in look without major remodeling.
Outdoor bar cart
For entertaining, use a rolling bar cart so the setup moves with your guests. Stock it for hot drinks and tuck everything back inside when the event ends.
- Quick cues: pick the spot you naturally reach for a cup.
- Prep needs: place near water and a waste bin when possible.
- Storage: match counter size to how many mugs and supplies you keep out.
Plan your layout for a smoother morning routine
Map the spots you use most so mornings move smoothly from start to sip. Place the busiest items where you naturally stand at the counter. This saves time and cuts clutter.

Keep brew, prep, and serve zones within arm’s reach
Divide your area into three zones: brew, prep, and serve. Put the coffee maker or kettle in the brew zone. Place grinders, pods, beans, and syrups in prep. Keep mugs, cups, and a spoon in the serve zone.
Build around counter height for everyday comfort
If you’re planning a remodel, aim for about 36″ counter height. That height makes using a maker feel natural for most people. Push backups to higher shelves so daily items stay within reach.
- One-step rule: make a drink without crossing the kitchen for water or sweetener.
- Morning setup: mugs nearest the pour, spoons next, syrups on a tray near the brew area.
- Safety & cleanup: route cords away from sinks, leave space behind machines for ventilation, and add a wipeable mat under the brew area.
Coffee and tea station essentials you’ll use every day
Set up a compact gear list that makes mornings faster and neater. Start with a reliable coffee maker that matches how you drink: drip for volume, an espresso machine for café-style shots, pour-over for control, or a French press for simple, full-bodied brews.
Select storage and tools
Add a grinder if you use whole beans—fresh grounds change flavor. Pair it with airtight jars so beans stay fresh when used daily.
Create a daily serve kit
Keep a small tray with mugs, cups, teaspoons, stirrers, sweeteners, and napkins. Add a tiny waste spot for used bags or pod lids so cleanup is fast.
Include tea basics and extras
Stock an electric kettle, a modest tea assortment, filters or infusers, plus a matcha whisk if you enjoy powdered blends. If you have extra room, tuck a toaster, butter dish, jams, or a cloche for baked goods to support quick breakfasts.
- Tip: use a rail system or a cabinet “tool zone” to hang measuring spoons and whisks.
- Tip: pick storage that keeps daily items within reach and backups tucked away.
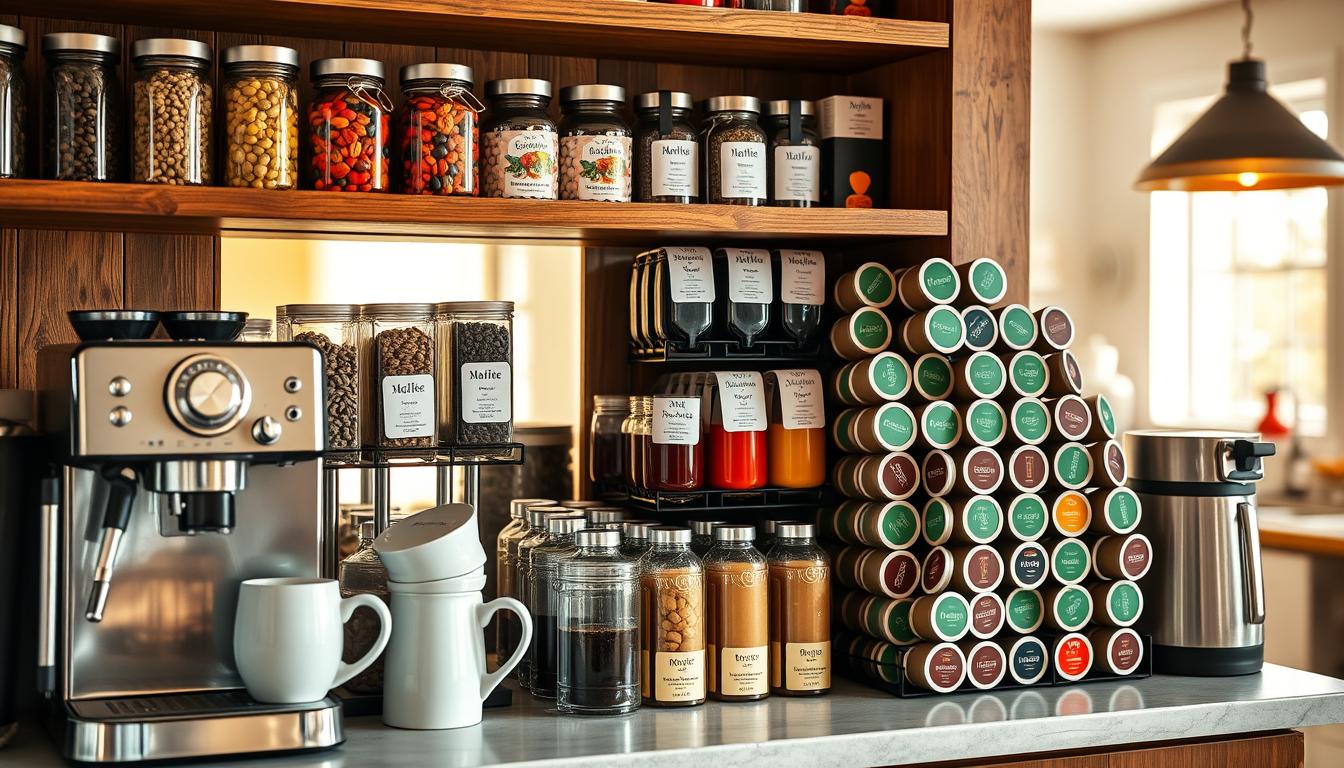
Organize coffee pods and capsules so they’re easy to grab
A simple sorting plan for pods cuts decision time and keeps your prep area neat. Start by grouping options by roast, brand, and caffeine level. This small step saves precious time on busy mornings when you want one quick cup.
Sort, label, and make it obvious
Use clear labels so anyone can grab the right choice. Label by roast (light, medium, dark), brand, and decaf or regular. A basic label system also makes restocking fast and accurate.
Pick the right storage for your counter
Compare three easy ways:
- Drawer inserts: hide pods for a tidy look and keep them organized by row.
- Clear jars: show what’s left at a glance and add a tidy, uniform look to a shelf.
- Countertop holders: smallest footprint for near the maker when you need speed.
Prevent clutter creep by keeping only the “current week” supply at hand. Move extra boxes to a backup cabinet or higher shelf. Keep enough pods for your usual routine plus a few guest choices, and add a tiny bin for used capsules so cleanup is fast.
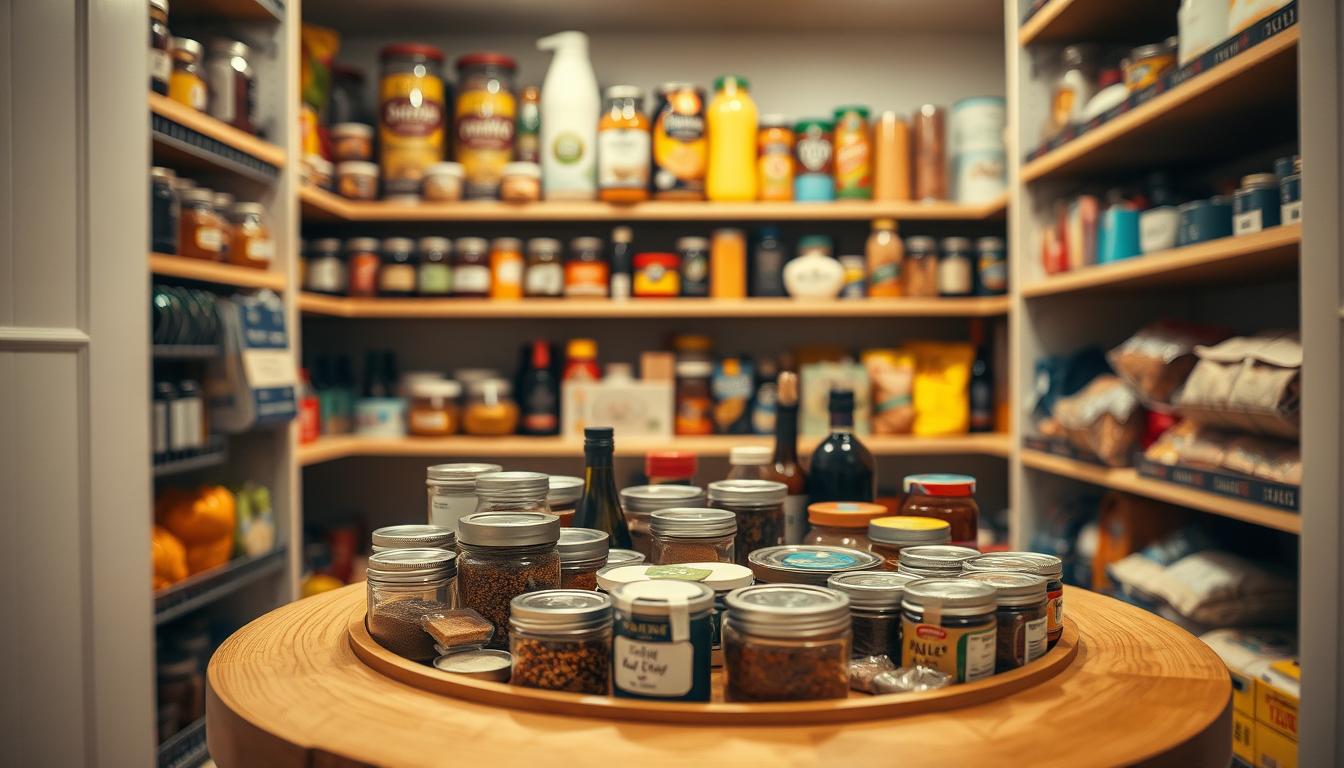
Store coffee beans and grounds to keep them fresh
A small change—swapping bags for airtight canisters—keeps flavor sharp and your prep area tidy.
Air, light, and moisture quickly dull aroma and taste. Use opaque, sealed jars to block light and lock out air. That simple upgrade preserves freshness far longer than a factory bag left open.
Label clearly: note roast, roast date, and decaf vs regular. Clear labels stop mix-ups during busy mornings and make restocking fast.
- Refill shelf: keep unopened backup bags on one dedicated shelf in the cabinet so they don’t sprawl across your kitchen.
- Rotation habit: use the oldest bag first, refill your main jar once a week, and keep only one open backup at a time.
- Placement: set the main jar near your grinder in the prep zone so making a cup becomes a single, smooth sequence.
If you lack full shelf space, use a narrow bin labeled “Refills” inside a cabinet. It keeps the set contained and helps the bar run without chaos.
Set up a syrup and sweetener station without the sticky mess
A small, deliberate syrup zone cuts stickiness and makes every drink easier to build. Place syrups where you reach for cups so spills stay contained. Style the spot so it feels tidy, not cluttered.
Group syrups on a wooden tray for easy cleanup
Use a footed wooden tray to gather bottles and pumps. The tray contains drips and moves quickly when you need counter space.
Use canisters for sugar and sweeteners
Choose lidded, easy-scoop canisters to corral granules and packets. Opaque jars cut visual clutter and keep the surface neat.
Place pumps, napkins, and drip mats where spills happen
Set pumps directly in front of the pour spot. Keep napkins and a small drip mat close by so messes stay local.
- Quick routine: wipe pumps weekly and rinse caps as needed.
- Design tip: keep decor minimal near syrups so you don’t move art or accessories each time.
- Pro placement: cluster accessories on one tray to make resets fast.
Make the most of a small countertop coffee station
A compact layout wins when you focus on height, a single serve zone, and quick storage. Use vertical tools to free surface room while keeping essentials within reach.
Use vertical storage to balance a large maker
Place a mug tree or wall hooks opposite an oversized coffee maker to create visual balance and easy access to mugs. Add a small pot with greenery to soften the look without using extra space.
Delegate one counter zone so the setup stays set
Reserve a short stretch of counter for the maker, mug holder, plus one container for spoons or sugar. This keeps the area functional all day and reduces daily take-downs.
- Minimal kit: maker, mug storage, one canister for spoons/sugar.
- Balance rule: place tall items opposite the machine to avoid crowding.
- Daily habit: reset the counter zone each night so mornings start clean.
Use shelves and cabinets to free up counter space
Adding a well-placed shelf can free inches of counter and bring daily items within arm’s reach. Use open shelving above your maker for mugs, filters, and a small tin of tea so the things you use most are easy to grab.
Install open shelving above your maker for daily grab items
Keep daily cups, a few favorite mugs, and the grinder on the lower shelf. This keeps the pour-over maker clear and reduces shuffle time.
Build a custom shelf for mugs, grinder, and accessories
Consider a wood shelf with cane webbing for texture and warmth, as Velinda Hellen suggests. Dedicate one stable ledge to the grinder so grounds don’t migrate across the counter.
Hide away essentials by storing appliances inside a cabinet
Reserve cabinet space for bulk refills and rarely used gadgets. Conceal the maker inside a deep cabinet when you want a cleaner look. Leave enough clearance above machines for steam and heat, and avoid overloading a single shelf with heavy jars.
- Open shelves hold daily items; cabinet doors hide backups.
- A custom shelf creates a clear hierarchy for your coffee bar.
- Strategic storage saves counter space so your kitchen stays tidy and functional.
Hang mugs and tools so you stop digging through cabinets
Freeing counter space starts with lifting your mugs off the surface and onto the wall. A wall-mounted solution makes your prep area feel larger and keeps daily items within easy reach.
Install a peg rack for display and easy reach
A peg rack keeps your favorite mug visible so you no longer dig through crowded cabinets. Designer Rebekah Murphy calls a mug peg rack practical for daily use and a charming focal point.
Hang the rack near the serve zone at a height you can reach with one hand. The display doubles as decor, so the area looks finished even when the rest of the counter is busy.
Add a rail system for spoons, whisks, and small tools
Use a rail with hooks to hold measuring spoons, a matcha whisk, scoops, and other accessories. Emily Bowser’s walnut cabinet setup shows how a small rail keeps a matcha maker, French press, and grinder in order.
- Move daily items off the counter: it opens visual space and speeds prep.
- Group by use: keep coffee tools together and tea tools together for easy self-serve.
- Style tip: choose a peg rack that reads as wall decor to tie the bar into your kitchen.
Create a coffee cart or bar cart station that moves with your day
A well-stocked rolling bar brings multiple brew options to guests without fuss. Use a compact cart when you have a small kitchen, rent, or need a multi-use piece that travels between rooms. A mobile setup frees counter space and makes hosting easier.
Stock a bar cart for multiple brew methods and guest preferences
Top tier: keep daily brew gear and serving cups close. Include a maker for coffee, an espresso option, and a simple French press. Add small jars of sweeteners, syrup pumps, and filters so guests can self-serve.
Hide bulky items with a cabinet skirt or fabric curtain
Use a skirt to conceal appliances, bags, and extra jars. Fabric hides clutter while keeping storage accessible. For outdoor use, add a waterproof cover and include hot chocolate mixes for seasonal menus.
- When to use a cart: renters, tiny counters, or hosts who move service room to room.
- Tier plan: top for daily brew, middle for cups and sweeteners, bottom for refills and tools.
- Mobility tips: choose locking wheels, keep liquids low, and use bins so items don’t tip while moving.
Roll it close in the morning, then tuck it away by noon to keep the kitchen clear.
Add water access the smart way
Water access is the quiet upgrade that saves steps and keeps your prep area tidy. A nearby supply makes fill-ups and rinses faster, which keeps counters cleaner and mornings calmer.
Add a prep sink near a butler’s pantry
A small prep sink is worth it when you build out a butler’s pantry. Kasey Fitzgerald recommends one for filling reservoirs, rinsing tools, and prepping without crowding the kitchen sink.
Consider a pot filler above an espresso machine
Mounting a pot filler over your espresso saves lifting heavy kettles and cuts spills when the maker sits away from plumbing. Confirm wall placement and clearance to avoid splash risk.
- Why it helps: less walking for water speeds routine and reduces mess.
- No-remodel option: keep a dedicated water pitcher or filtered dispenser nearby.
- Plan cautions: check studs, clearances, and drip paths before installing fixtures.
Do this right and your coffee bar will feel more efficient, safe, and ready for daily use.
Style your coffee station to match your kitchen
Match tones and textures so the serving nook blends with cabinets and counter surfaces. Repeat finishes, hardware, and color to make a small coffee bar feel built-in without a remodel.
Use a crisp black-and-white palette for a tidy, modern bar. Limit accent hues, pick matching canisters, and keep your most-used mugs within reach for a neat, organized ritual.
Prefer softer looks? Aim for neutral tones and cohesive accessories to keep the area calm even when fully stocked. The Merrythought notes a clear neutral scheme simplifies a coffee cabinet visually.
Marnie Oursler recommends a wall treatment behind the bar to add depth. Paneling, tile, or wallpaper will anchor the nook and draw the eye to a polished prep area.
Consider a waterfall counter edge when you want a refined finish in a niche or pantry. Shannon Kadwell says matching cabinetry and countertop makes the corner read as part of the kitchen while still standing out.
- Quick tip: repeat cabinet hardware so the coffee bar reads as intentional decor.
- Function-first: style with items you use daily so nothing needs moving each morning.
- Design nod: keep one focal wall to add dimension without clutter.
Decorate with simple accessories that make the station feel intentional
A few small accessories can instantly make your prep nook feel curated and calm. Keep choices minimal so the area stays easy to use each day.
Use a wooden tray as your base. A footed tray groups mugs, a small plant, and a framed print so the coffee bar footprint reads as one tidy vignette. It also makes cleanup faster—lift the tray, wipe the counter, then set it back.
Warm wood shelves and a simple styling formula
Natural wood shelves add warmth, especially against white cabinetry or subway tile. The contrast softens appliances and keeps the nook feeling homey.
- Styling formula: mugs + small foliage + one framed print = finished look without clutter.
- Limit materials to wood, ceramic, and glass so replacements and restocks match easily.
- Keep only a few movable pieces so wiping down a shelf or the counter stays fast.
Swap decor seasonally without redoing your whole setup
A quick seasonal swap keeps your prep nook feeling fresh without a full redesign. Focus on display items while leaving core supplies where they work best.
Rotate mugs and small accents for spring, summer, fall, and winter
Keep it simple: change the mugs you show and one or two small pieces each season. A wooden mug tree makes swaps fast—Sarah Joy Blog recommends this so you can rotate without disrupting workflow.
Go festive for holidays with layered, guest-ready essentials
For hosting, set a bar cart near the prep area. Pretty in the Pines suggests layering a wreath, a small reindeer, and framed art while keeping extra cups, sweeteners, and hot chocolate stocked for guests.
- Spring/summer cue: florals and light ceramics.
- Fall cue: pumpkins and warm tones.
- Winter cue: evergreens and cozy textures.
Pro tip: keep festive items contained on a tray so you can reset in a day without moving core coffee, tea, or tools.
Build a budget-friendly DIY coffee bar with Dollar Tree-style finds
Stretch a few dollars into a charming fall-themed brew nook that still works. Choose small, practical pieces so your setup stays useful every day.
Create cozy fall vibes with faux pumpkins and burlap
Pick faux pumpkins, warm-toned leaves, and a burlap ribbon for instant autumn style. Tuck these items to one side so the maker and mugs stay easy to reach.
Make DIY labeled jars for coffee, cocoa, and sugar
Use clear jars, printable labels, and a permanent marker to mark three jars: coffee, hot chocolate, and sugar. Group the jars on a small wood tray so refills and access stay neat.
Finish with candles and a tray for an affordable, styled countertop
Add one or two unscented candles and a wood tray to corral mugs, jars, and syrup pumps. Keep flames well away from hot appliances and leave a clear pad for the maker.
- Quick how-to: assemble decor on one tray so you can lift it for cleanup.
- Safety tip: place flammable decor away from heat and reserve space for daily tools.
- Practical note: choose pieces that don’t block drawers, jars, or pod access.
Keep your pantry coffee station organized over time
Commit to a five-minute refresh each week and your prep corner will stay useful and calm. Small, regular habits stop clutter from building and make mornings easier.
Set a weekly reset routine for jars, pods, and syrup bottles
Once a week, refill jars, straighten pods, wipe syrup bottles, and return tools to their zones. This quick round takes only a few minutes and keeps the layout intact for Monday morning.
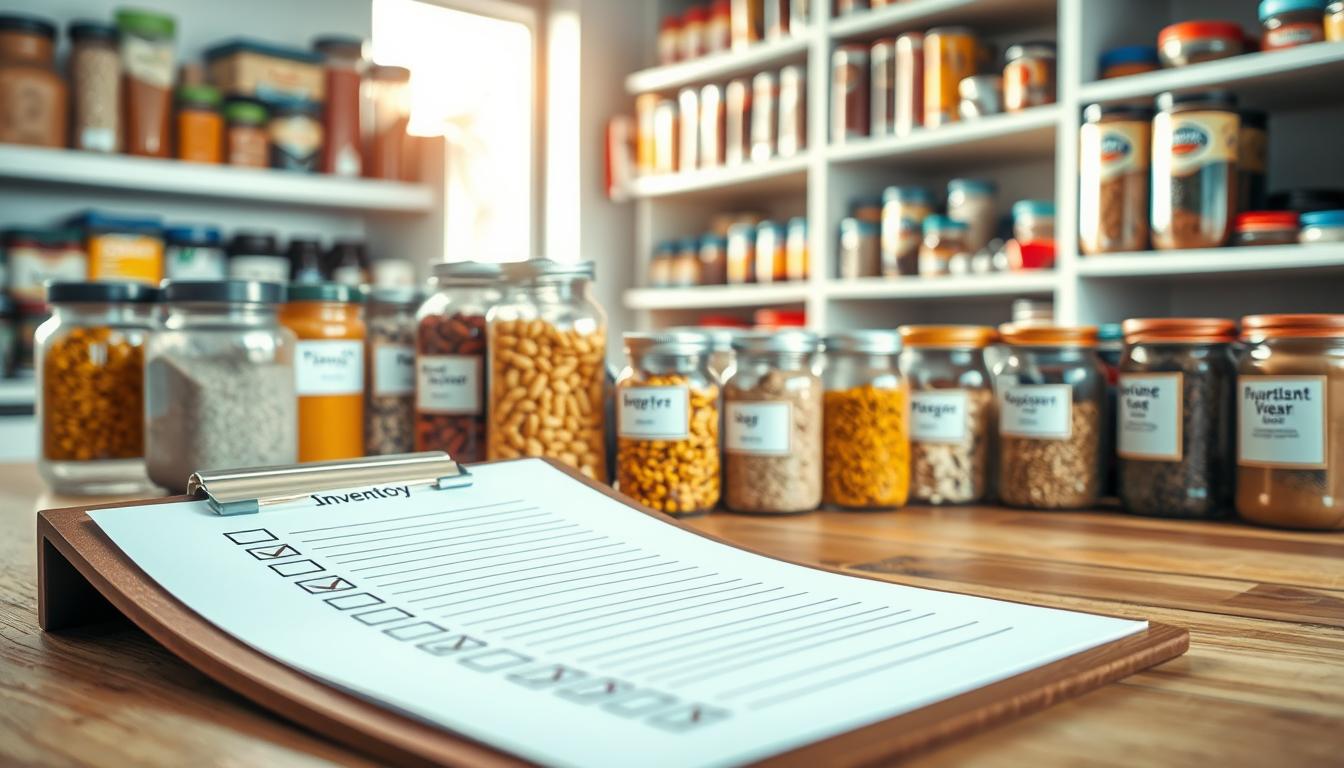
Create a restock list so you don’t run out
Keep a simple restock list on a whiteboard, phone note, or paper pad. Track coffee, tea, hot chocolate, and common extras so you avoid last-minute trips.
Protect your space with wipeable mats and a spill kit
Place wipeable mats under the brew area and the syrup tray to catch drips. Store a small spill kit (cloth, mild cleaner) in a nearby cabinet or shelf for fast cleanups.
- Backup control: limit bulk refills to one shelf or one cabinet bin.
- Daily micro-resets: spend 30–60 seconds after use to keep the bar neat.
- Time saver: weekly checks prevent big cleanups later.
Conclusion
Finish strong by arranging the make area so each step flows. Choose a single place in your kitchen, set clear brew, prep, and serve zones, and pick storage that keeps pods, beans, and syrups within reach. This makes daily use faster and less messy.
Start small: one maker, a few cups, and one organized shelf will change your routine. For bigger upgrades, add wall hooks, open shelves, a hidden cabinet zone, or a mobile cart to fit your space and habits.
Keep it easy: commit to a weekly reset, keep a restock list, and use wipeable mats to protect counters. These simple habits keep your coffee and tea area tidy, guest-ready, and enjoyable every day.