Yes — you can keep everyday bottles in a pantry, but not all bottles are equal. For casual, ready-to-drink bottles, a cool, dark closet can work. For special or age-worthy bottles, aim for better control.
Focus on temperature and light. UV rays and heat spikes harm flavor and corks. Even short warm periods can speed aging or cause off notes.
In most American homes, the best pantries are windowless and away from ovens, heaters, or sunny walls. A steady, slightly cool spot that avoids daily swings is “good enough” for regular bottles.
This guide will give you a quick checklist, simple prep steps, rack options, and when to consider adding a small cooling unit. By the end, you’ll know where to place bottles, how to measure your space, and steps to protect corks and flavor starting today.
What Wine Needs to Stay Fresh at Home
Keeping bottles at home works best when conditions stay steady, not simply when you have extra room. Stability matters far more than square footage for preserving taste and value.

Why steady conditions beat a big closet
Your biggest enemies are wide temperature swings, bright light, low humidity that dries corks, and vibration. These factors speed unwanted aging and dull the aroma.
Short-term versus long-term care
If you plan to finish bottles within weeks or months, a cool, steady spot works. For years of aging, you need cellar-like conditions.
- Repeated warming/cooling cycles can prematurely age bottles and flatten flavor.
- Bottles sealed with corks benefit from 50–70% humidity to prevent shrinkage and oxygen ingress.
- Minimize vibration and light to protect labels and delicate aromas.
Use this section as your baseline: aim for steady temperatures, low light, moderate humidity, and little disturbance. Later sections show how to reach those targets step by step.
When a Pantry Works for Wine and When It Doesn’t
Not every closet or cupboard will do. Choose a dark, quiet spot that avoids heat and daily traffic. That gives you the best chance to keep bottles tasting as they should.

Choosing the right pantry location in your kitchen or home
Pick a space against an interior wall rather than an exterior wall. Interior walls stay cooler and suffer fewer temperature swings.
Avoid areas next to ovens, laundry rooms, or west-facing walls that get afternoon sun. Those spots heat up and cool down quickly, which harms flavor.
Warning signs your pantry is too warm, bright, or “busy”
Watch for these red flags:
- Warm walls or noticeable hot spots near small appliances or fridge compressors.
- Light leaks around doors or any window that lets sun in.
- Frequent door slams, heavy foot traffic, or stored appliances that vibrate.
- Doors that stay open while you cook, causing constant air exchange.
If you see these signs, move bottles to a cooler corner. When the closet is dark, quiet, and sealed well, pantry wine is practical for everyday use.
Wine Storage in Pantry: Your Quick Suitability Checklist
Before you buy racks or cooling units, run a fast checklist to judge your space. This lets you decide yes, no, or maybe in five minutes and saves time and money.
Temperature stability and the 55°F benchmark
Check how steady the room stays. Aim near 55°F as a reference point, but stability matters more than hitting that exact number.
If daily swings exceed 10°F, mark the space as a “maybe” and consider adding cooling units or moving bottles elsewhere.
Light exposure and why windowless pantries win
Look for windows, glass doors, or bright fixtures that stay on. Any UV or frequent light will harm labels and aromas.
Windowless, dark closets win for protection and require fewer upgrades.
Vibration risks near appliances and heavy foot traffic
Tap shared walls and listen for rattles. Shelves next to fridge compressors, dishwashers, or busy walk paths increase vibration.
If shelves shake or doors slam often, choose a different spot or add damping pads to reduce movement.
How many bottles your pantry can realistically hold
Measure floor area. Typical closets of about 16–25 sq ft can hold roughly 200–400 bottles with efficient racks (depending on layout).
For smaller or irregular spaces, plan for under-counter units or tighter modular racks to maximize capacity.
- Quick result: yes (steady ~55°F, dark, quiet), maybe (minor fixes needed), no (major heat, light, or vibration).
- Estimate capacity, then pick racks or units that match your goal: casual access or long-term collection care.
- Next step: set your storage goal and choose passive racks or a cooling solution based on this checklist.
Set Your Storage Goal Before You Change Anything
Clarify what you want the space to do before you buy racks or call a contractor. Your choice determines cost, complexity, and the final look of the area.
Everyday “ready to drink” vs. true cellar care
If you need a simple, grab-and-go zone, pick shallow racks and open shelving. This works for frequent bottles you plan to finish within months.
For a proper wine cellar that protects bottles for years, plan on insulation, tight seals, and a cooling strategy. That upgrade is a bigger project and budget.
Bulk capacity, label-forward display, or a hybrid
Decide if you want max count, easy browsing, or both. Many pantries can combine deep stacks and shallow, label-forward rows for quick selection.
Space-smart design ideas include metal pegs set into shallow niches and hidden columns behind tall doors. These save depth and keep a clean look.
-
- Define purpose: daily access or long-term cellar?
- Build level: simple racks vs. insulated cellar.
- Inventory plan: label, log, rotate older bottles first.
-
- Layout ideas: pegs, niches, cabinet-integrated columns.
- Design options: modern metal, warm wood, minimal look.
- Dual use: combine bulk and display zones where depth allows.
-
- Style direction: match finishes to nearby cabinetry.
- Access: keep frequent bottles at eye level.
- Plan for growth: leave 10–20% extra capacity for new additions.
Prep the Pantry for Bottles, Racks, and Airflow
Empty the space completely so you can measure, inspect, and plan airflow without guesswork.
Clear and assess shelving
Remove food, spills, and boxes that carry odors. Leftover crumbs or strong-smelling items will compete with delicate aromas.
Note: Standard shelves often aren’t rated for heavy bottles. You may need to remove or reinforce them before adding racks.
Measure the room carefully
Record wall-to-wall widths, ceiling height, baseboard depth, and door swing. Check door clearance so racks won’t block access.
Plan airflow and basic electrics
Avoid packing bottles into dead corners where heat can build. Leave circulation paths for even temps, especially if you add a cooling system later.
Map outlets, plan LED lighting routes, and note where a cooling unit or vents would fit. Allow service access for filters, vents, and units before racks go in.
- Checklist: clear, measure, reinforce, allow airflow, plan power/service access.
- Tip: mark locations on a simple floor plan to guide installers or DIY work.
Get Temperature Right Without Cooking Your Wine
A steady range matters more than perfection. Aim near 55°F as a guideline, but your main win is avoiding swings that accelerate aging.
Ideal ranges and why consistency beats perfection
Target a cool, steady band—roughly 50–59°F—and prioritize stability over hitting a single number. Small, repeated shifts do more harm over time than a slightly warmer constant.
Heat-source hot spots to avoid
Check for warm pockets by placing a thermometer at bottle level for a week. Watch areas next to ovens, above dishwashers, behind refrigerators, and west-facing walls that bake each afternoon.
Passive storage vs. a dedicated cooling unit
If your pantry stays stable near 55°F year-round, passive storage is a low-cost option. For larger collections or summer heat, add a cooling system for reliable temps.
- Self-contained through-the-wall units are simple to install and keep temps steady.
- Split or ducted systems suit larger wine cellar layouts and heavy use.
- Place units to avoid blocking racks and to prevent uneven zones near walls or corners.
Control Humidity to Protect Corks and Flavor Over Time
Humidity levels shape how well cork-sealed bottles hold their aroma over months and years. Keep moisture steady so corks stay supple and you reduce oxidation risk.
Target humidity range for pantry wine storage
Aim for 50–70% relative humidity. That range keeps corks from drying and prevents labels from peeling. Too dry air lets corks shrink; too damp air invites mold and swelling.
When you need a humidifier and when you don’t
Decide by checking your local climate, HVAC dryness, and how sealed the room is. If the room stays near the target range year-round, simple monitoring may be enough.
- What cork protection does: keeps seals tight and slows air ingress that causes off flavors.
- Low-cost steps first: add a hygrometer, seal gaps around doors, and store bottles horizontally when possible.
- When to upgrade: if readings fall outside 50–70% or you want true cellar performance, consider a small cellar humidifier as an option.
Keep it measurable: the more you treat humidity as a spec, the closer your space will behave like a proper cellar and protect bottles over time.
Insulation and Vapor Barriers for Pantry-to-Cellar Performance
If you want cellar-level performance, focus first on the room envelope: the walls, doors, and ceiling that meet outside air. Proper insulation and a vapor barrier turn a casual closet into a reliable wine cellar by cutting temperature and humidity swings.
Recommended insulation levels and why they matter
A practical target is R-19 to R-30. That range works well for small builds. Pick R-30 when a wall faces an exterior or during very warm climates. If you add a cooling unit, tighter R-values reduce runtime and save energy.
What a vapor barrier does for humidity control
A vapor barrier blocks moist air from passing through walls and ceilings. This keeps humidity steady inside the cellar and protects adjacent home materials from condensation or mold.
Seal points to prevent rapid swings
Focus sealing on door edges, thresholds, and any ceiling penetrations for plumbing or wiring. Patch gaps around baseboards and corners so outside air can’t sneak through.
- Doors: add tight gaskets and a sweep at the threshold.
- Ceiling: seal light holes and attic access with weatherstripping.
- Walls: insulate cavities fully and use a continuous vapor layer.
Choose moisture-resistant, low-odor finishes near bottles so paints and sealants won’t off-gas. Better sealing reduces equipment workload, improves stability, and lowers noise if you run a cooling unit.
Keep Light Out: Pantry Lighting and Door Choices That Protect Wine
Light control is one of the easiest upgrades that yields big protection for your bottles.
UV rays and heat break down delicate aromas and can discolor labels. Even brief sun through glass produces cumulative damage. That makes controlling light and glare a non-negotiable part of good wine storage.
LED basics for low heat and low UV
Choose LED fixtures with low heat output and minimal UV. Mount lights away from bottle necks and use motion sensors or timers so illumination stays off except when you need it.
Glass doors versus solid doors
Glass doors look premium, but tall glass near west-facing windows can add glare and heat gain. Solid doors give the best protection for long-term collections.
- If you pick glass doors: use UV-rated or tinted glass and avoid west-facing exposures.
- Positioning: place the display away from direct afternoon sun and active kitchen areas.
- Lighting tips: opt for low-heat LEDs, shield fixtures, and keep run times short.
Bottom line: a darker, well-sealed closet will outperform a bright display every time. With the right glass choices and smart lighting, you can balance style and protection for your wine storage.
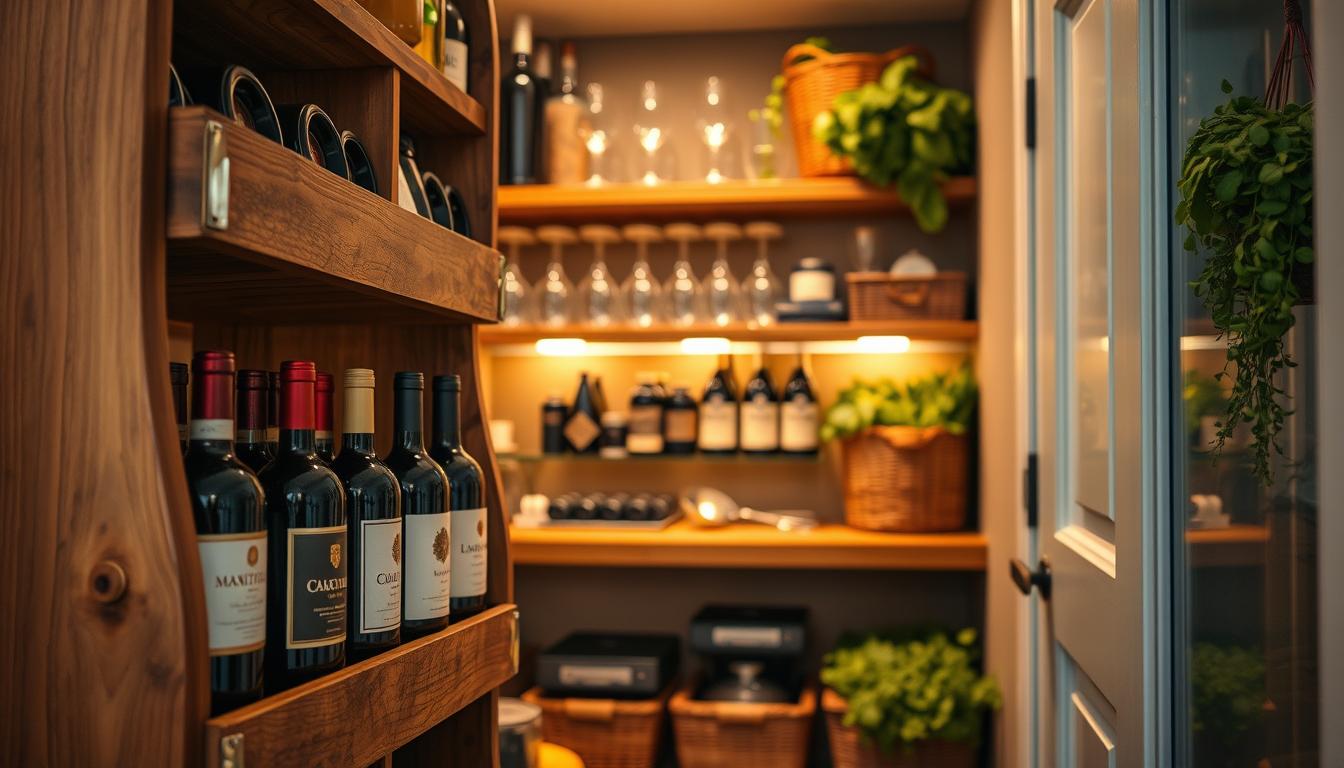
Choose Wine Racks, Shelves, and Wall Systems That Fit Your Space
A well-planned racking layout turns a narrow cupboard into a high-capacity display. Start by deciding whether you want flexibility or a precision fit.
Modular vs. custom options
Modular wine racks give you DIY-friendly flexibility and lower cost. They work well if you expect to reconfigure or move. Custom systems maximize capacity and match cabinetry finishes for a built-in look.
Metal pegs, shallow niches, and label-forward ideas
Designers favor metal pegs and shallow niches for tight areas. These allow label-forward storage so you can scan your collection without removing bottles. Metal elements also pair well with chrome or gloss cabinetry for a modern display.
Vertical layouts and floor-to-ceiling solutions
Floor-to-ceiling racks exploit vertical wall space and can push capacity toward 200–400 bottles in larger closets. Vertical columns keep bottles secure and make inventory easier to manage.
Why standard shelves fall short
Standard pantry shelves aren’t rated for bottle loads. They lack proper depth, can let bottles roll, and often fail on weight. Purpose-built racks protect necks, prevent scuffing, and support long-term access.
- Match rack choice to your kitchen cabinets and traffic patterns.
- Prioritize stability, access, and label visibility when designing wine racking.
- Consider professional measurement for tight or high-capacity projects.
Reduce Vibration and Noise in a Busy Kitchen
If your kitchen buzzes with appliances and foot traffic, bottles may feel every jolt and rattle. That constant motion can disturb sediment and nudge corks, shortening shelf life and dulling aroma.
Soft-close hardware and shelf liners to tame rattles
Add soft-close hinges and slides to cabinets and rollouts to stop slamming. These parts cut impact and prevent repeated micro-vibration that moves bottles over time.
Use cork or rubber liners on shelves so bottles sit on a stable, cushioned surface. Liners absorb tiny shocks and stop glass from knocking against wood or metal.
Where rollouts and cheap slides cause trouble
Cheap rollout slides often create a humming, back-and-forth motion every time they move. That motion transmits through a rack or system and lets bottles shift slightly with each kitchen use.
- Common vibration sources: nearby appliances, slamming cabinet doors, and heavy foot traffic routes through the kitchen.
- Most failure point: rollouts with low-quality slides that amplify micro-movement.
- Quick fixes: tighten all fasteners, replace flimsy slides, and add damping pads behind cabinets.
For lasting results, isolate racks by adding spacing, anchoring units to studs, and using foam or cork dampers at contact points. These options keep your pantry functional while protecting bottles from daily kitchen life.
Maintain Your Pantry Wine Storage System Like a Pro
A quick monitoring habit saves corks, labels, and keeps bottles ready to drink.
Monitoring temperature and humidity with simple digital tools
Use a digital temperature and humidity monitor that logs readings. Place it at bottle level so you read true conditions, not ceiling air.
Check the display weekly and record any swings. Small alarms notify you when humidity or temperature leaves your target range.
Quarterly cleaning and hardware checks that protect labels and corks
Every three months, wipe shelves with a soft cloth and mild cleaner. Avoid harsh chemicals that can harm corks or fade labels.
Inspect LED lighting, tighten loose hardware, and replace rattly shelf pins. Quick fixes stop bigger problems later.
Organizing your collection so older bottles get used first
Use a simple “first in, first out” rotation. Keep everyday bottles at easy reach and move older ones forward for use.
Label rows by arrival month or vintage to avoid guesswork and reduce handling that can disturb corks.
Basic cooler upkeep: vents, seals, and airflow
If you run a small cooling unit, vacuum the front vent each quarter and confirm door seals are tight. Blocked vents or loose gaskets raise energy use and cause hot spots.
Ensure airflow pathways are clear so the unit runs quietly and efficiently. Consistent maintenance keeps your system stable over time.
- Simple routine: weekly monitor checks, quarterly cleaning, and rotation habit.
- Protect labels: mild cleaners only, inspect LEDs and fixtures.
- Keep units efficient: vacuum vents, test seals, and verify airflow.
Plan Your Budget and Pick DIY vs. Professional Installation
A simple plan separates must-have upgrades from nice-to-have luxuries. Set your budget first, then match choices to the collection size and how long you’ll keep bottles.
Typical cost ranges for insulation, racks, lighting, and cooling
Budget basics: expect DIY totals from a few hundred to several thousand dollars depending on scope.
- Insulation/vapor barrier: $100–$300
- Racks and shelving: $100–$800+
- Cooling units: $500–$2,000 (optional)
- Paint, tools, and lighting: $100–$300
Custom cabinets, premium finishes, or full climate systems drive costs higher. If you want long-term cellar performance, plan for higher R-values and pro labor.
What upgrades are reversible if you may sell your home
Choose reversible options when resale matters. Freestanding or modular racks, non-permanent cabinet inserts, and removable lighting keep your home flexible.
- DIY wins: install racks, add LED lighting, and place freestanding units yourself.
- Hire pros for: electrical work, ducted cooling, and tight sealing for true cellar conditions.
- Decision tip: pick storage-only upgrades if you want low cost; build a full wine cellar when long-term aging justifies the spend.
Conclusion
Turn a usable closet into a reliable bottle zone by prioritizing steady temperatures, low light, and minimal vibration.
Assess the space, set a clear goal, then prep the area with proper racks and seals. Choose passive arrangements for casual needs or add a cooling system for long-term aging.
Key targets: keep conditions consistent, aim for 50–70% relative humidity, and use sturdy racks rather than standard shelves. Control doors, light leaks, and hot spots near the kitchen to protect your collection.
Start small: measure your space, sketch a rack layout, pick LED lighting, and set a simple maintenance routine. These steps make a practical pantry wine cellar upgrade both affordable and effective.