Your goal is simple: turn deep, awkward corner space into an “everything within reach” area that makes daily cooking easier. This intro shows why access matters more than piling on shelves and previews the 10 practical tips you’ll use.
You’ll learn quick wins like measuring, choosing the right layout, and adding pull-out systems. You’ll also get advice on vertical use, shelf safety, zoning, clear containers, lighting, finishes, and occasional maintenance.
Whether your setup is built-in, a corner cabinet, or a freestanding unit tucked into the kitchen, these ideas fit real homes. The focus is on both function and design so your area reads as intentional, with warm wood tones, glass doors, and thoughtful lighting that match 2026 trends.
Some tips are weekend-friendly. Others show when custom work is worth it for deep shelves and dead zones. Start by noting what you already own and what you store so every change is chosen on purpose.
Why Deep Corner Pantries Become Wasted Space in Your Corner Kitchen
Deep, hard-to-reach shelving often hides what you own. You lose track of items, buy duplicates, and see food expire in the back. That wasted space makes daily cooking slower and more frustrating.

Common pain points: what goes wrong
In a tight kitchen corner, visibility drops fast. Small jars disappear behind tall boxes and you end up emptying whole shelves to find one thing.
- Back-of-shelf “black holes” where items go missing.
- Tipping and toppling of tall bottles on upper ledges, which is unsafe.
- Clutter creep: when it’s annoying to put things away, you pile at the front.
What true easy access looks like
Easy access means you can see, reach, and return items without moving others or kneeling. Spot blocked corners, awkward angles, or shelves that don’t match what you store.
Next steps: measure first, pick the right layout, then add thoughtful shelving and features to eliminate dead zones.
Measure Your Corner Pantry Before You Buy Any Storage Solution
Start with numbers: the right measurements stop pull-outs from hitting a door and make every inch useful. Take the time now and avoid returns, modifications, or wasted parts later.
Door swing, double-door clearance, and the true usable footprint
Measure each door swing and note the hinge side. For double doors, check the overlap zone so you know what a pull-out can actually clear. Then record interior box dimensions — width, depth, and height — to define the real usable footprint, not the outer cabinet size.
Shelf depth, shelf spacing, and identifying dead zones
Map shelf depth and mark where your arm stops reaching comfortably. Label areas where items get trapped. Measure shelf spacing so shelves fit what you use and reduce those unreachable pockets.
Match measurements to what you actually store day to day
Measure tallest and widest goods: paper towels, 2-liter bottles, and small appliances. Place daily essentials like canned goods, oils, and cereal at easy heights.
- Quick checklist: width, depth, height.
- Hinge location and door swing.
- Outlet locations and face-frame or trim that affect inserts.
- Measure the largest goods you keep on shelves.

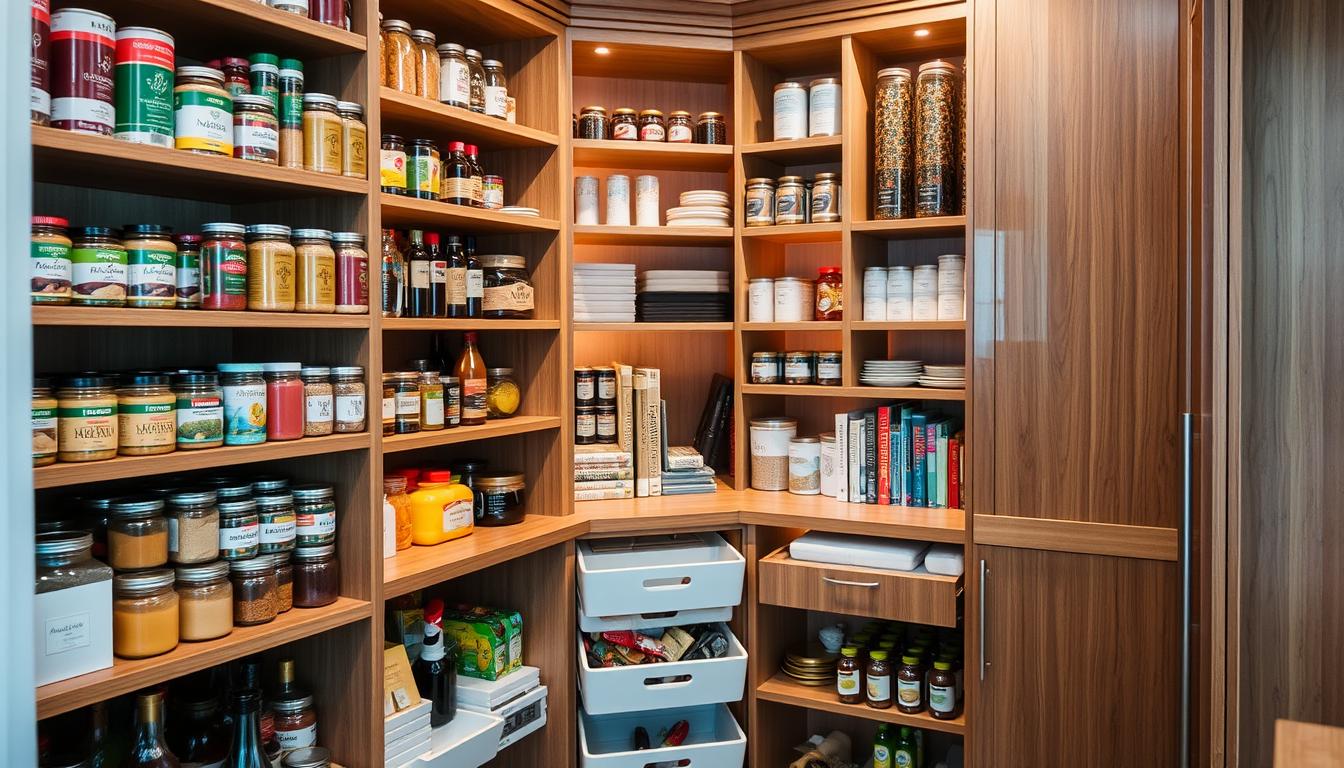
Pick a Layout That Blends Seamlessly Into Your Kitchen Design
Pick a layout that turns awkward depth into clear zones and effortless reach. The right plan makes the area feel like it belongs, not like an add-on, and it also sets the tone for how you use every shelf.
Built-in nook designs often disappear into cabinetry and can feel like a mini room. They give you the most flexible shelving and zoning. A built-in solution can be tailored so the interior matches your kitchen finishes and the nook truly blends seamlessly kitchen.
Corner cabinet pantry vs. freestanding options
Corner cabinet pantries look like a continuous run of cabinets. From the outside, the kitchen reads calm while the inside holds high capacity. This approach keeps the overall design quiet and cohesive.
Freestanding units make sense for rentals, quick upgrades, or when you need a simple fix in an underused corner. They let you test layouts before committing to built-in work.
- Angled and wraparound shelves reduce dead gaps and improve sight lines.
- Pick finishes—warm wood or bright white—that change how open the interior feels.
- Match layout to traffic flow so the pantry feels like part of the room and not an afterthought.
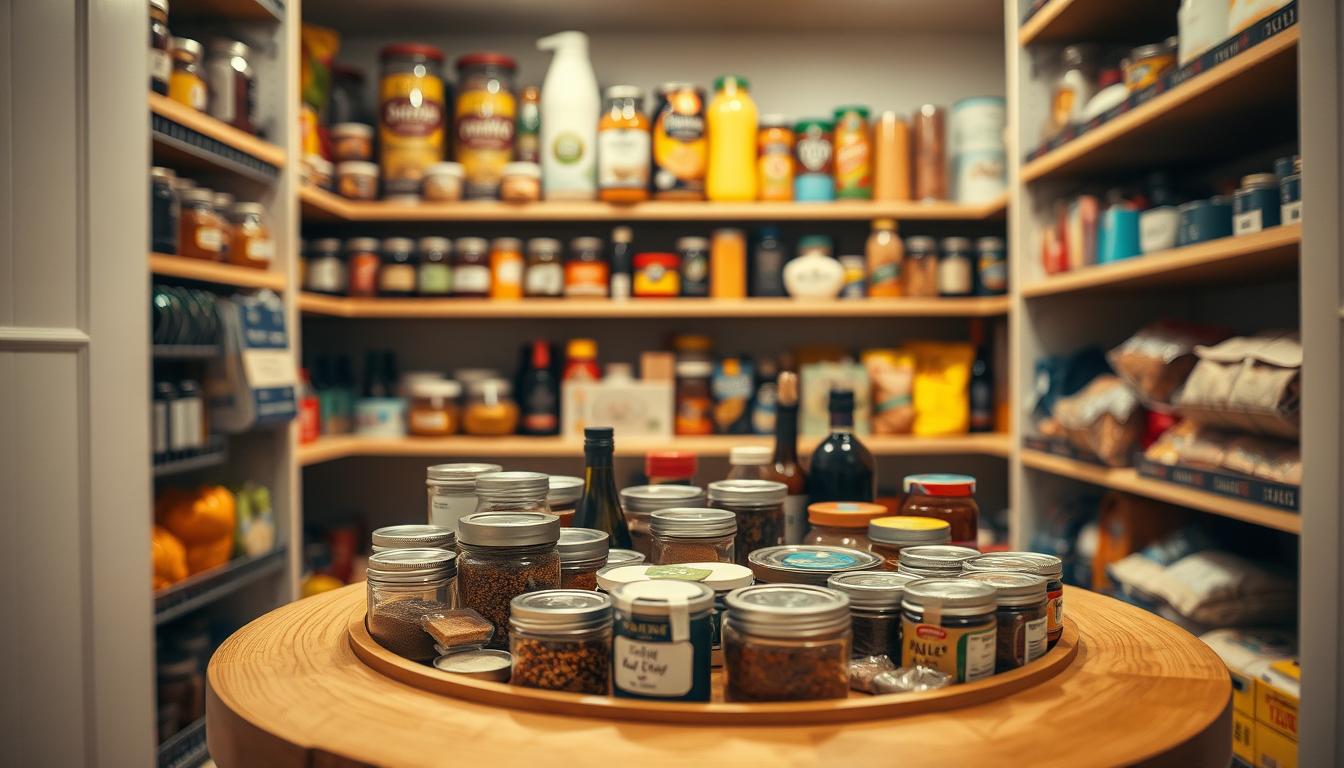
Corner Pantry Storage Systems That Fix Deep-Shelf Access
Motion solves what fixed shelves cannot: items at the back stop being invisible. If shelves stay static, the deep recess becomes a black hole you avoid.
Revolving trays that rotate 360°
Revolving trays (lazy Susan style) let you spin items into view. ShelfGenie offers custom revolving trays that rotate fully to reduce rummaging and wasted buys.
Cabinet drawers that extend
Corner cabinet drawers slide out so goods come to you. When a drawer extends, you get front-facing access for cans, jars, and small appliances.
Glide-Out, Pull-Out, and Glide-Around systems
Pull-out shelves are the workhorse fix: pull the whole shelf forward to see everything at once.
Glide-Around solutions handle tight corners and awkward angles where typical pulls hit walls or lose capacity.
- Choose a solution by what you store: small jars need shallow shelving; bulk items need heavier rails.
- Check weight capacity and daily-use frequency before you buy.
When access is effortless, returning items becomes easy. That small change keeps the area tidy and makes your kitchen routine smoother—often the best way to stop clutter from coming back.
Use Corner-Cut Pull-Outs to Return Wasted Space
Reclaim odd recesses with pull-outs shaped to follow the cabinet’s footprint. These Corner-Cut Pull-Outs are carved to fit the angle where a straight shelf loses usable depth, so wasted space becomes practical room for goods.
When they work best in tight angles
They shine in tight corners, odd angles, and zones where full-depth drawers can’t operate. If a normal pull-out binds or leaves a back gap, a corner-cut design fills that void.
Choose widths and heights for real essentials
Pick widths that stop jars and bottles from tipping when you slide the unit. Aim for shallow aisles for cans and jars, and taller trays for boxes and bottles.
- Widths: firm enough to prevent rattling, but wide enough to hold daily goods.
- Heights: low tiers for cans, mid tiers for sauces, and tall tiers for cereal and bottles.
- Plan access: check pull-out travel and handle clearance so returned space is actually reachable.
For best results, dedicate one pull-out to everyday essentials and a second to backup goods. That approach balances quick access with bulk capacity and keeps the cabinet organized for daily use.
Maximize Vertical Storage With Pull-Out Heights That Match Your Goods
Stack smarter: match each pull-out height to the items you reach for every day. Vertical planning removes wasted air space and makes a deep corner pantry feel custom without custom carpentry.
Single-height pull-outs for canned goods and everyday staples
Use single-height pulls for cans and small jars. They keep rows stable and visible. Restocking is faster and you avoid toppled items.
Double-height pull-outs for upright boxes
Double-height pull-outs hold pasta, rice, and similar boxes upright. Labels face forward and boxes won’t collapse into a messy pile. This makes finding ingredients quicker when you cook.
Triple-height pull-outs for tall, bulky items
Reserve triple-height tiers for paper towels, 2-liter bottles, and tall containers. These tall pulls convert an awkward tall place into a controlled zone that is easy to reach.
- Measure first: record the tallest item in each category and add finger clearance so pulls don’t scrape knuckles.
- Group by frequency: place daily essentials at waist or eye level; bulk and occasional items higher or lower for safety.
- Plan shelving mix: combine single, double, and triple heights so the area works for all your goods.
Matching pull-out height to what you store reduces tipping, improves visibility, and speeds up routines in your kitchen. Small vertical choices make the whole system feel built-for-you.
Make Upper Shelves Safer and More Visible With Smart Shelf Details
Make the high shelves work for you by adding small design tweaks that cut tipping and improve pick-up speed. Focus on the top rows because that’s where tall items shift and spills happen most.
Sloped surfaces for tall items
Slopes on a shallow shelf keep bottles angled so they won’t tip forward or back. The tilt also makes labels easier to read from below.
They work best in the upper tier that holds oils, vinegars, tall bottles, and narrow containers. Install a shallow front lip to stop sliding.
Divider shelves for flat items
Divider Shelves store sheets, cutting boards, and trays upright so you stop stacking and wrestling. Vertical slots make each piece reachable without shifting a stack.
Dividers also cut noise and reduce breakage by keeping items separated in deep shelving.
- Why focus up high: tipping and hidden items cause most frustration.
- Where slopes help: upper rows for tall, narrow bottles.
- Divider benefit: grab one sheet or tray without moving others.
These details improve daily access so you can grab what you need quickly and safely. Small adjustments make the whole system feel intentional and easier to use.
Try Open Shelving Where It Improves Reach and Reduces Clutter
A few open shelves can turn a confusing corner into a simple, grab-and-go zone.
Open shelving is a tool, not a rule. Use it when visibility improves and mess decreases. If it becomes a dumping ground, the idea fails.
Where open shelving helps most in a corner pantry (and where it doesn’t)
Choose open shelving for grab-and-go categories like snacks, breakfast items, and quick meal shortcuts. Seeing choices saves time and keeps your kitchen routine smooth.
Avoid open shelves for messy packaging or backstock unless you commit to clear containers, labels, and weekly resets. Without that habit, visual noise builds fast.
- Side access on open shelves gives clearer sight lines than deep enclosed shelves.
- Use baskets and bins to corral small goods and reduce visual clutter.
- Place most-used open shelves between waist and eye level; put lighter, less-used items on top shelves.
Zone Your Pantry Like a Pro So You Stop Losing Items in the Back
Give every category a dedicated home and you end the habit of digging through piles for one item. Zoning is the simplest way to keep things visible and usable.
Everyday cooking zone
Place oils, spices, and go-to ingredients where you reach first. Keep this zone at eye or waist height on pull-outs or mid-level shelves for fastest access.
Baking and breakfast zone
Group flours, sugars, cereals, and snacks together. Use clear containers and a consistent shelf height so mornings and baking go smoothly.
Backstock zone
Put bulk buys and duplicates low on the cabinet floor or deep pull-outs. Add a simple rule: don’t let backstock block daily items. That keeps the main area tidy.
Entertaining zone
Store serving pieces and rarely used goods higher up. That way special items don’t compete with everyday goods for prime places.
- Shelf plan: heavy backstock low, daily items mid-level, rarely used higher.
- Habit: one-in, one-forward to keep fronts rotated and reduce waste.
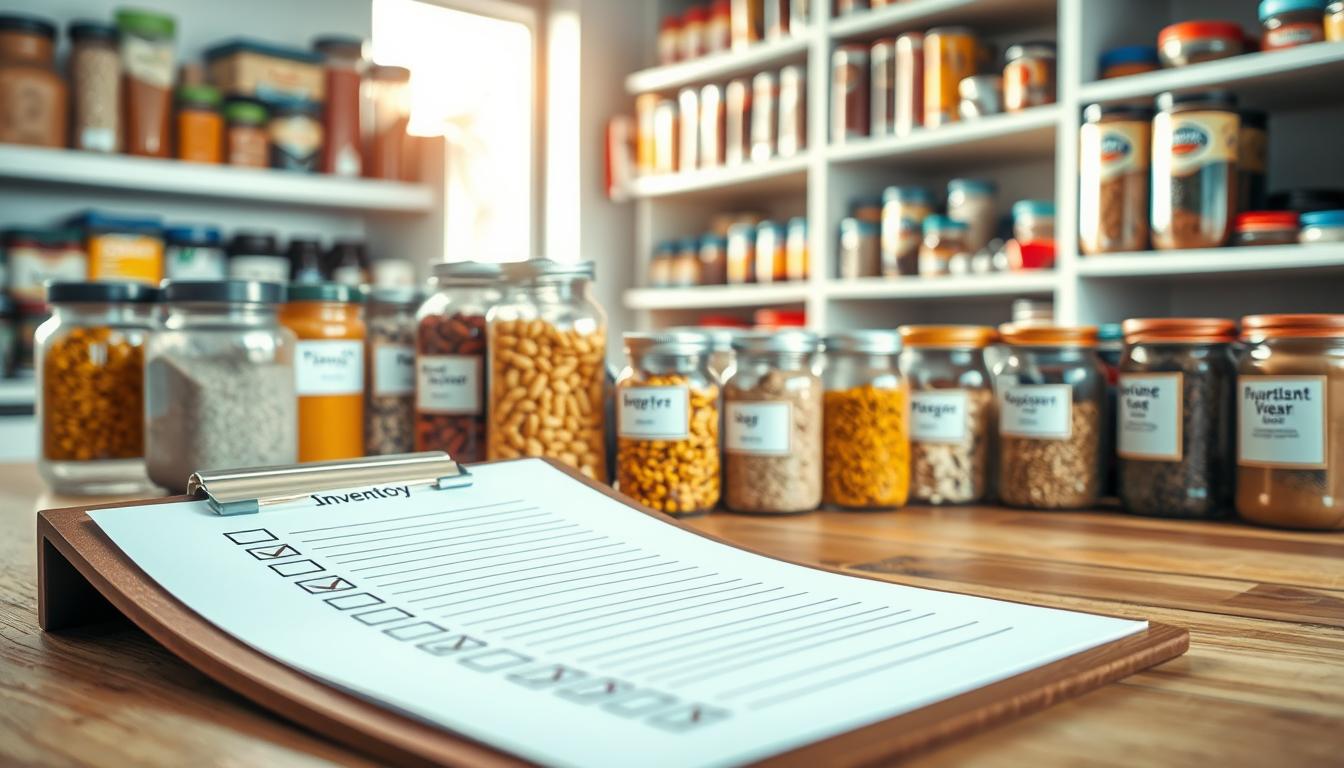
Use Clear Containers and Consistent Shelf Spacing for At-a-Glance Storage
Clear, consistent containers make tallying what you have as simple as a quick glance. Decanting removes noisy packaging and shows quantity immediately, which is crucial when shelves run deep and items can hide in the back.
Pick square or rectangular containers so rows line up neatly against angled walls and you reduce wasted gaps. Boxes and odd shapes leave air pockets; straight-sided containers create tidy, stackable rows that feel intentional.
Keep shelf spacing consistent so your most-used containers fit without wasted vertical space or unstable stacks. Aim for one size per shelf tier: a low tier for cans, a mid tier for jars, and a tall tier for bulk jars or boxes.
Labeling and quick routines that cut duplicates
Use big, readable labels on fronts and optional date stickers on lids for rotation. When you can see “rice” and how much remains, you stop buying a second bag by accident.
- Zone by use: assign containers to breakfast, baking, and snacks so everyone finds things fast.
- Decant station: keep a small bin and a marker in the interior to pour and label without spills.
- Reset habit: weekly checks keep rows straight and items visible, which reduces waste.
Upgrade Lighting So Your Corner Pantry Feels Like Part of the Room
Good lighting changes a deep, dark cabinet into a clean, usable extension of your kitchen. It’s not just decorative—proper light eliminates shadowed shelves that hide food and create clutter.
LED strip lighting and under-shelf fixtures give even, low-heat illumination across the full depth of shelving. Run strips along the front edge or beneath each shelf so light reaches the back wall and the wraparound sections stay visible.
In deep cabinets, a single overhead puck often leaves the corner dark. Layer lighting: combine an overhead with under-shelf runs to remove black spots and make labels readable from eye level.
- Choose warm white LEDs to match kitchen finishes and avoid harsh color shifts.
- Use motion-sensor switches so lights come on when you open the door for hands-free convenience.
- Place strips flush with the shelf underside or along the shelf front for even coverage in wraparound areas.
When everything is visible, you return items correctly and spot low supplies sooner—lighting directly improves how your pantry feels and performs within the room.
Choose Doors and Finishes That Fit Your Kitchens Style and Function
The right door and finish balance visibility, upkeep, and the overall look of your kitchen. Think about how often you open the cabinet, how tidy you keep shelves, and whether you want the area to show or to vanish.
Glass-front options
Glass-front doors increase visibility without throwing the room into visual chaos. They encourage neat containers and labels because what’s inside is visible at a glance.
Solid doors
Solid doors create a seamless run of cabinetry so the pantry disappears when closed. This suits minimalist kitchen design where a clean line matters more than immediate sight lines.
Finishes and interior choice
- Warm wood interiors add depth and a cozy feel.
- Bright white interiors maximize perceived brightness and make small corners feel open.
- Finish maintenance: darker finishes hide scuffs; lighter finishes show dirt sooner but improve visibility.
Match hardware, paint tones, and cabinet style so the result feels intentional and tied to the rest of your kitchens design.
Make Deep Corner Pantry Shelves Easier to Clean and Maintain
Keeping deep shelves clean starts with making every surface reachable. Deep recesses hide spills and crumbs where you rarely look. That unseen mess adds up and makes organization fail.
How pull-out and glide-out solutions help
When a pull-out or glide-out brings a shelf to you, you can wipe the back and edges without unloading everything. This reduces the time and effort needed to clean and keeps lids and labels visible so leaks are spotted fast.
Quick weekly reset routine
- Set aside 10 minutes each week. Pull out one shelf, toss empties, and wipe sticky spots.
- Use wipeable, non-slip liners only where they won’t bunch under moving parts.
- Monthly, do a back-of-shelf check to rotate older items forward and catch leaks early.
Why this matters: easier cleaning equals less clutter over time. In your kitchen, reachable shelving reduces wasted buys and keeps pantry zones logical and usable.
When Custom Corner Pantry Shelving Makes Sense
Persistent dead zones, bowed shelves under heavy goods, or layouts that never stay tidy are clear signs standard shelving has run out of options.
A designer-led plan starts with an in-home assessment and precise measurements. The pro team maps what you store and recommends a tailored solution that prioritizes daily use and easy access.
Signs you’ve outgrown basic bins and shelves
- Items disappear in deep recesses or hit the back wall when you reach in.
- Shelves bow or sag under heavy goods, making the area unsafe.
- You constantly reshuffle but the layout never stays organized.
What to expect from a designer-led, fully customizable plan
A designer recommends revolving trays, corner drawers, and glide systems that turn unusable pockets into accessible rows. Recommendations match your goods, from cans to tall bottles, so each cabinet functions as intended.
Quality markers and credibility to verify
- Durable parts and smooth extension hardware that handle daily use.
- Professional installation and long-term guarantees so the work holds up.
- Look for experience and formal promises—ShelfGenie has provided designer-led solutions since 2000 and backs its work with the Neighborly Done Right Promise® plus lifetime guarantees and North American manufacturing.
Custom work costs more up front, but weigh that against time saved and fewer wasted buys. If you cook often and rely on your pantry every day, a tailored plan can be the best way to convert an awkward corner into a reliable kitchen asset.
Budget-Friendly Corner Pantry Ideas You Can Do This Weekend
A handful of low-cost upgrades lets you turn a chaotic corner into a useful, everyday zone in just a few hours.
Start with easy fixes: add shelf risers, shallow turntables, and clear, matching containers. These quick swaps make seeing and grabbing items much faster.
Next, adjust shelf heights so cereal, pasta, and cans fit without wasted vertical space. Move items to match the new tiers and avoid awkward gaps above tall boxes.
- Weekend upgrades: shelf risers, lazy Susans for oils and sauces, and stackable bins for snacks.
- Lighting hack: stick-on motion sensor LEDs brighten dark zones instantly.
- Labeling: clear, readable tags help everyone return goods to the right spot.
Work one zone at a time so you finish the weekend with a complete, usable area. These kitchen pantry ideas are low-cost and need no remodel, but they deliver a big daily payoff.
Conclusion
Wrap up with a clear plan: make access the priority, then tune every inch to match how you cook in your kitchen.
Start by diagnosing wasted zones, measure carefully, pick a layout that fits your flow, and add pull-outs and simple shelf details that bring items forward.
Visibility wins: use clear containers, bold labels, and layered lighting so the pantry stays organized long after your first clean-out.
Treat zoning as your maintenance plan so items don’t drift to the back. Weekend fixes can boost function fast, while custom solutions solve the hardest corners for good.
When one design makes access easy and looks seamless, your pantry feels like a natural part of the kitchen — every inch put to work without new clutter.